
I write this tired and happy after a successful exhibition debut at RailEx over the weekend. I'm really very pleased, and totally exhausted.
First, before I witter away, massive thanks to Kev Prince (Mr45144) who flew up from Christchurch for the weekend, got the hang of operating the layout in barely five minutes and helped keep me sane all weekend. Seriously, it would not have been nearly so fun or easy without him. Also to my wife, although she doesn't read the forum! She's put up with my stressed state and been totally helpful with useful, intelligent criticisms
I'd be lying if I said Bad Horn has operated perfectly. Temperature and atmospheric differences meant some parts didn't run as smoothly as at home, and general bumps from the public and such less-smooth running meant the delayed action of my preferred couplings was lost at times as wagons bounced apart and then back together. I need a standard H0 back to back gauge, as 00 fine standard isn't quite right, but there weren't many derailments. I got the 364 working, but it was unreliable. Luckily Kev brought up a 212, which relieved the traction shortage very nicely. I still resorted to running an out of period 220 though, but whether that was really a last resort or succumbing to temptation I don't know. Problems or not, I think Bad Horn was well received by the public. I was slightly surprised by how much some children liked it, as its really a shunting plank and there were lots of layouts with sound, lights etc, so it goes to show that received wisdom isn't always right. The biggest flattery came from the fact that a good few Germans were very complimentary about the layout (Surprising how many there were, but Wellington is full of expats), and now I'm comfortable that I can create a good sense of a time and place really quite alien to me- books and pictures are my sources.
There are a few ifs and buts regarding lessons, but the important consideration is that the layout was initially built with bits I had lying around. Any comments about what I should have used for certain aspects (mainly the track) are really null, because they aren't the things I would go out and buy!
But what now? There's a few details that I could add, and improvements I could make, but as always I just feel like moving on. Not through frustration, but through a desire to keep advancing my modelling. In the short term (ie the remainder of this year) I could finish ###### (H0e) which is gathering dust and dents in the garage at present. It needs a couple of new points and scenic work finishing. I'm tempted to use it as a test best for scratch building overhead electrification as I have a Mariazellerbahn train and it's all on one board. On the other hand, I could get it to a point at which it looks attractive, then sell it to clear the space. I'm not very satisfied with the running qualities of H0e. Beyond that, I have a desire to turn my modelling time and resources towards longer term, high standard targets. I've fallen out of love with Steinrücken, as flat top baseboards and 180ocurved stations just aren't satisfying. If anything I could take the base level (ie concealed storage roads) and start a fresh scenic level, but at this point I think I'd like to move away from fictional stations and do something more fulfilling. There are two main avenues of thought in my mind at present, that of a mainline layout with a yard (I'm really not that fussed about having a station) or a full branch line with the distances between yards/industries pretty well ignored- I'd be most content running pick up freights. The latter would allow a number of self-contained layouts to be built as part of a larger whole, giving something to play with quickly which then blossoms into something approaching a system.
There are a number of other questions of era and scale, although at present H0 remains front runner for decent shunting and breadth of range (plus the fact I have a decent amount already). TT is as small as I'd go, and the 28 Oots plus a dozen type Ys I already own have potential...
Anyway. Please excuse my sleep deprived ramblings. Thanks again to Kev, it's a been a bloody good weekend mate!
Sunday, November 21, 2010
Wednesday, September 1, 2010
Silberling Supertest
Aside from locomotives, probably the key signature vehicle for a West German layout set from the 1960s through to the 1990s is the humble Silberling (literally Silver Piece, but also commonly referred to as Silverfish by UK enthusiasts). Over 7,000 were built, so their presence was almost universal on the DB. Even today, modernised examples still work daily in many areas. The short rakes make them ideal for smaller layouts as well, two to four being pretty normal. Just about any loco can go with them too, , with a flick through Die DB der achtziger Jahre illustrating haulage behind class 141, 220, 112, 211, 104, 212, 111, 215, 140, 110, 181, 216, 218, 202 (Henschel Prototype), 144, 118, and 169 and even 193. It seems the only types not illustrated hauling them were 103s and 120s! For Bad Horn though, a 212 will be the main hauler. I'd recommend die Bundesbahnzeit if you're seeking inspiration for use of Silberlingen.

With such omnipresence, one might expect that a scale length H0 version be a permanent fixture in the catalogue of at least one manufacturer. This was not so, although versions have been made by Roco, Lima and Ade. All of these are fairly expensive, priced up to £70. In addition, availability is poor, with Roco only periodically releasing variants, and the Lima models yet to resurface under Hornby's ownership (although announced as a four pack in silver and traffic red liveries in this year's Rivarossi range).
Lately, Piko's Hobby range has been steadily expanding, and the Silberling is the most recent newly tooled coach family to join the range. The "Rabbit hutch" cab design was first on the market, and not unexepectedly the "Karlsruhe"
 type followed in this year's announcements. As is usual for Piko Hobby models, the prices are well below the equivalent items in standard ranges, in fact only just over slightly half the price compared to Roco. As you'd expect, shortcuts have been taken. But does half the price mean half as good?
While the Roco model is undoubtedly more refined, the simple act of putting the two brand's models into the same rake does not immediately jar to my eyes. Standing back at "normal viewing distances" the noticable differences are the heavy (about the scale thickness of an arm!) weld lines on the Piko model's roof and a difference in ride heights. The rooves are different colours, but from photograph's I'd say either is realistic. Although having the two colours in one rake might look silly, it's perfectly prototypical! Getting back to the roof ribs, even on Roco they're too heavy, so it might put some buyers off. Sometimes the weld lines on the real thing are next to invisible.
Getting up close, some of the savings become quicky apparant. While Roco have applied separate handrails, on the Piko model they are moulded on, and the Roco model features rivet detail around the windows. That said, the rivets are not particularly noticable on the prototype. Also, Piko have moulded on the electric train heat cable, which is a customer-fitted detail on the Roco coach.

The quality of the bodyside glazing is surprisingly high on the Piko model, showing only slight prismatic effects. However, on the cab, the retaining clips of the corner windows are plainly visible. In fact, the cab glazing as a whole is not that great.

You may have also noticed on the last couple of pictures that there are some fuzzy edges to the blue paint on the Piko model. I'm actually surprised by this, as generally I find Piko's finish superior to Roco's. That said, as the solebar on the Roco model is separate to the main body, they can't fail to have a crisp separation of colour. There's definite bleed on the first class yellow stripe, but it's not too noticable.

Still on the finish, I think I prefer Piko's representation of the "peacock tail" pattern on the lower bodyside, but there's not a great deal in it. Lettering and logos is very crisp on both, and as far as I can work out, the technical details on both is correct, along with representative servicing dates.
Perhaps one reason Piko felt able to include Silberlingen in their Hobby range is the generally simple nature of the details they have. There's not that much need for additional details, and turning to the underside we can see some of the few that Roco have seen fit to include compared to Piko's moulded on representations, specifically the brake rigging.
Keeping my eyes down under, there appears to be only slight discrepancy between the various undergubbins represented by the competeing marques.
The Roco model shows more refinement in the parts, but you'd hope so at the price! Piko's glazing shows a surprising upper hand, in having the handles for opening the windows moulded- Roco has no representation of them at all. However, Roco's refinements shine through again on their pickup method compared to Piko's, namely bearings collecting from all wheels, while Piko have adopted a strip picking up from the axles, meaning only two wheels per bogie collect current. Piko do put the power to good use, with nice warm-white lighting for the forwards direction. Surprisingly, no provision for DCC appears to have been made, although I await a reply to an email I have sent Piko requesting assistance in this respect. Back to the bogies, Roco have used multiple mouldings while Piko uses a simpler one piece model, although the dynamo is a separate part. No representation of the sanding gear or Indusi which should be present on the Steuerwagen is made though.

Around the doorways, Roco again show their mettle- the footsteps are individual mouldings, giving an excellent appearance. Piko's modelling of this area is less flash, and it would benefit from a bit of the buyer's attention, probably nothing more sophisticated than a bit of styrene strip.

To be continued

With such omnipresence, one might expect that a scale length H0 version be a permanent fixture in the catalogue of at least one manufacturer. This was not so, although versions have been made by Roco, Lima and Ade. All of these are fairly expensive, priced up to £70. In addition, availability is poor, with Roco only periodically releasing variants, and the Lima models yet to resurface under Hornby's ownership (although announced as a four pack in silver and traffic red liveries in this year's Rivarossi range).
Lately, Piko's Hobby range has been steadily expanding, and the Silberling is the most recent newly tooled coach family to join the range. The "Rabbit hutch"
While the Roco model is undoubtedly more refined, the simple act of putting the two brand's models into the same rake does not immediately jar to my eyes. Standing back at "normal viewing distances" the noticable differences are the heavy (about the scale thickness of an arm!) weld lines on the Piko model's roof and a difference in ride heights. The rooves are different colours, but from photograph's I'd say either is realistic. Although having the two colours in one rake might look silly, it's perfectly prototypical! Getting back to the roof ribs, even on Roco they're too heavy, so it might put some buyers off. Sometimes the weld lines on the real thing are next to invisible.
Getting up close, some of the savings become quicky apparant. While Roco have applied separate handrails, on the Piko model they are moulded on, and the Roco model features rivet detail around the windows. That said, the rivets are not particularly noticable on the prototype. Also, Piko have moulded on the electric train heat cable, which is a customer-fitted detail on the Roco coach.

The quality of the bodyside glazing is surprisingly high on the Piko model, showing only slight prismatic effects. However, on the cab, the retaining clips of the corner windows are plainly visible. In fact, the cab glazing as a whole is not that great.

You may have also noticed on the last couple of pictures that there are some fuzzy edges to the blue paint on the Piko model. I'm actually surprised by this, as generally I find Piko's finish superior to Roco's. That said, as the solebar on the Roco model is separate to the main body, they can't fail to have a crisp separation of colour. There's definite bleed on the first class yellow stripe, but it's not too noticable.

Still on the finish, I think I prefer Piko's representation of the "peacock tail" pattern on the lower bodyside, but there's not a great deal in it. Lettering and logos is very crisp on both, and as far as I can work out, the technical details on both is correct, along with representative servicing dates.
Perhaps one reason Piko felt able to include Silberlingen in their Hobby range is the generally simple nature of the details they have. There's not that much need for additional details, and turning to the underside we can see some of the few that Roco have seen fit to include compared to Piko's moulded on representations, specifically the brake rigging.
 |
| Roco |
 |
| Piko |
 |
| Roco |
 |
| Piko |

Around the doorways, Roco again show their mettle- the footsteps are individual mouldings, giving an excellent appearance. Piko's modelling of this area is less flash, and it would benefit from a bit of the buyer's attention, probably nothing more sophisticated than a bit of styrene strip.

To be continued
Sunday, August 22, 2010
The light at the end of the tunnel
Is just someone with a torch bringing me more work.
A couple of friends have asked me for pictures of where I'm up to with Bad Horn, and I've not got round to taking any recently. I've ground to a halt for want of inspiration and materials (although signals and bufferstops are on their way), and to try and motivate myself I had a look at all I've done so far. And felt utterly disheartened.

I still haven't got the backscene effectively blended into the scenery, although it has improved. I also made a jobs list of outstanding work. So far I've come up with:
And every time I think for a minute, another task comes to mind, and that's without trying to add character and cameos.
I'm actually utterly frustrated with my own abilities, I find the layout looks garish and train set like. It's too shallow (only 300mm deep) which leads to most of the visual problems. Still, I'm determined to complete this one, so just gotta keep plugging away.
A couple of friends have asked me for pictures of where I'm up to with Bad Horn, and I've not got round to taking any recently. I've ground to a halt for want of inspiration and materials (although signals and bufferstops are on their way), and to try and motivate myself I had a look at all I've done so far. And felt utterly disheartened.

I still haven't got the backscene effectively blended into the scenery, although it has improved. I also made a jobs list of outstanding work. So far I've come up with:
- Fit bufferstops
- Fit point motors
- Fit signals
- Weeds
- Repaint hardstanding (I just can't get it the right colour)
- Put fence or crash barrier around hardstanding
- Repaint the signal box
- Bushes for backscene blending
- More trees (left hand end)
- Put a track on the overbridge
And every time I think for a minute, another task comes to mind, and that's without trying to add character and cameos.
I'm actually utterly frustrated with my own abilities, I find the layout looks garish and train set like. It's too shallow (only 300mm deep) which leads to most of the visual problems. Still, I'm determined to complete this one, so just gotta keep plugging away.
Friday, August 20, 2010
Red Double Deckers
Originally posted 15/8/2010
Amongst the releases promoted by Piko this year, some older models cascaded from Classic to Hobby range caught my eye. These were the refurbished ex-DR double deck coaches in traffic red. This shuffling was accompanied of a RRP reduction from Eur93.49 to 39.99 in the case of driving car, and from 69.99 to 29.99 for the all 2nd. Previously these coaches has only been available in the Hobby range as (innacurate) Metronom examples. With such a saving, some economies were surely inevitable. Nevertheless, I placed an order for a couple and waited...
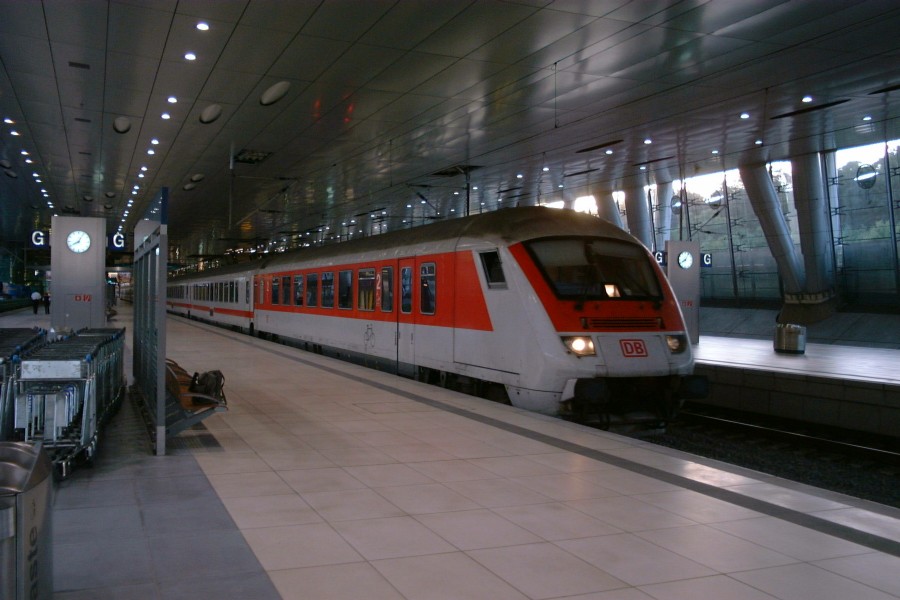
Last week, they finally found their way to my post box. Although they weren't the most common type on Rügen (this falls to the unavailable-as-a-model DABbuzfa 760) they were certainly present around 2000, so they're the best thing available to me for my Regional Expresses. Like an excited child at Christmas, I eagerly pulled them out of their packaging for a good look. Naturally, the driving car (DABbuzfa778.0) draws my attention most.

Shortcuts or otherwise, it certainly looks the part. Without going into any great detail, the only thing that gives me any cause for concern in the basic model is that perhaps the cab isn't raked back far enough. Have a look at the prototype to see whether you agree.
Really my concern with these models isn't any fundamental accuracy issues, it's what detailing they might need to be brought up to a similar standard to my Roco coaches. With the financial saving compared to the classic models, I'm prepared to put a bit of effort in. So rather than being a review, this post mainly concerns my search for the modelling I will want to do.
The biggest job is the window frames. They're aluminium or something on the prototype, and in the catalogue images they appeared painted. However, those catalogue images were probably actually the classic models. The unpainted clear plastic on the model just doesn't look right. I have tried painting window frames previously, but it's tedious and needs a good steady hand, which I don't always have. I think my best option might be to try drawing up an etch to make overlays from stainless steel. They'll be a nice straightforward thing to learn etch design with too.
Another obvious area is the bogies. Compared to the classic model, Piko have reduced the number of parts drastically. It's essentially just the basic frame now, no brake rigging or other details. Here's the leading bogie, drivers side of a Piko "Classic" DBmq 776.

As you can see, it has brake blocks nicely in line with the wheels and an indusi (German AWS equivalent, a bit more like ATP) receiver. Now, the equivalent view on the "Hobby" DABbuzfa778.0.

It shouldn't be too hard to make up the missing details. They are different on the DABbuzfa778.0 to the DBmq776 though, and there is the addition of sanding gear.
There's also quite a lot of printed detail.

I'm not sure what I'll do about this, I always find it hard to blend added details into the factory finish. I'll just see how much it bugs me over time for now!
Finally, the model lacks factory fitted lighting. However, it is available as an accessory part, but at 30 Euros I will probably just make my own. It's not a job I find tricky!
As a closing note, a front end comparison between the "Classic" DBmq 776 and Hobby DABbuzfa778.0.

Amongst the releases promoted by Piko this year, some older models cascaded from Classic to Hobby range caught my eye. These were the refurbished ex-DR double deck coaches in traffic red. This shuffling was accompanied of a RRP reduction from Eur93.49 to 39.99 in the case of driving car, and from 69.99 to 29.99 for the all 2nd. Previously these coaches has only been available in the Hobby range as (innacurate) Metronom examples. With such a saving, some economies were surely inevitable. Nevertheless, I placed an order for a couple and waited...
Last week, they finally found their way to my post box. Although they weren't the most common type on Rügen (this falls to the unavailable-as-a-model DABbuzfa 760) they were certainly present around 2000, so they're the best thing available to me for my Regional Expresses. Like an excited child at Christmas, I eagerly pulled them out of their packaging for a good look. Naturally, the driving car (DABbuzfa778.0) draws my attention most.

Shortcuts or otherwise, it certainly looks the part. Without going into any great detail, the only thing that gives me any cause for concern in the basic model is that perhaps the cab isn't raked back far enough. Have a look at the prototype to see whether you agree.
Really my concern with these models isn't any fundamental accuracy issues, it's what detailing they might need to be brought up to a similar standard to my Roco coaches. With the financial saving compared to the classic models, I'm prepared to put a bit of effort in. So rather than being a review, this post mainly concerns my search for the modelling I will want to do.
The biggest job is the window frames. They're aluminium or something on the prototype, and in the catalogue images they appeared painted. However, those catalogue images were probably actually the classic models. The unpainted clear plastic on the model just doesn't look right. I have tried painting window frames previously, but it's tedious and needs a good steady hand, which I don't always have. I think my best option might be to try drawing up an etch to make overlays from stainless steel. They'll be a nice straightforward thing to learn etch design with too.
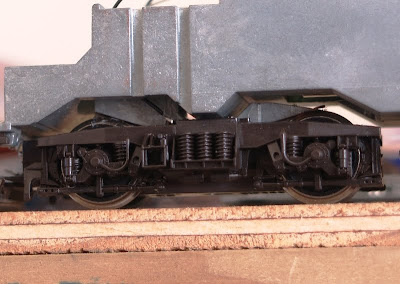
Another obvious area is the bogies. Compared to the classic model, Piko have reduced the number of parts drastically. It's essentially just the basic frame now, no brake rigging or other details. Here's the leading bogie, drivers side of a Piko "Classic" DBmq 776.

As you can see, it has brake blocks nicely in line with the wheels and an indusi (German AWS equivalent, a bit more like ATP) receiver. Now, the equivalent view on the "Hobby" DABbuzfa778.0.

It shouldn't be too hard to make up the missing details. They are different on the DABbuzfa778.0 to the DBmq776 though, and there is the addition of sanding gear.
There's also quite a lot of printed detail.

I'm not sure what I'll do about this, I always find it hard to blend added details into the factory finish. I'll just see how much it bugs me over time for now!
Finally, the model lacks factory fitted lighting. However, it is available as an accessory part, but at 30 Euros I will probably just make my own. It's not a job I find tricky!
As a closing note, a front end comparison between the "Classic" DBmq 776 and Hobby DABbuzfa778.0.

On the fiddle and at the tea
Originally posted 11/8/2010
Following a suggestion from Phil Harding of using tea leaves for leaf litter, and the realisation that the current malty breakfast blend I'm currently drinking has an admirable mix of leafy bits, sticky bits and general dust I dried some post-brewing dregs out on a baking tray in a low (50oC) oven. The brewing and drying made it lighter colours too, which look better than the very dark pre-brewing shades. Three pots and a quick grind with a pestle and mortar to generate a bit more fine material, some dilute PVA, and the result is pictured...

I had other more expensive products suggested to me, but the tea looks the business and you get to have a nice brew in the process.
On a more significant turn, I have finally made a traverser fiddle yard for Bad Horn, having bought the runners months ago. No rocket science here, just checks with a set square and a lot of luck. Well, except for one thing... I had already built a pair of boards for a conventional points ladder type yard, and to drill the holes in the end piece of the new traverser I decided I'd take the end piece off the previous board and use it as a template. So, I merrily whipped out the screws to the longitudinal battens and gave it a tap with a hammer to break the glue bond. It barely twitched. So, I laid the board down on the deck, stood in the middle to stop it moving and gave a couple of good belts. Off came the end piece, along with part of the top, well held with three more screws... Oops.

Anyway, other than my own stupidity there were no problems in the build. I did notice that the MDF shelf I am using as the top piece (18mm- I didn't feel like making two frames, and didn't trust myself to make them both square) was sagging in the centre, so popped down to Mitre 10 to get one more runner for the central cross member. Of course, drawer runners are only sold in pairs, so I have one spare. Pictured here is the base frame before the central runner went in. Note that the runners are a little short. I'm using a 300mm wide shelf, but the runners come in 250 or 400mm lengths. Still, as it moves both ways, that's no problem.

There was one bit of really good luck. By turning a batten on its side, its depth plus the ply top at the end is within a millimetre of the depth of the shelf plus runners. That saved a lot of messing about!

You can also see the sag that concerned me in that image.
Next stage, maybe even tomorrow, I'll head to the Warehouse and get some cheap workmates to act as layout support. At $20 each with four needed for the layout, it's cheaper than I can make legs for. Also, Diane has authorised Bad Horn's semi-permanent erection in our spare room/study- even though it means moving her desk.
I've been at the grass, man
Originally posted 30/7/2010
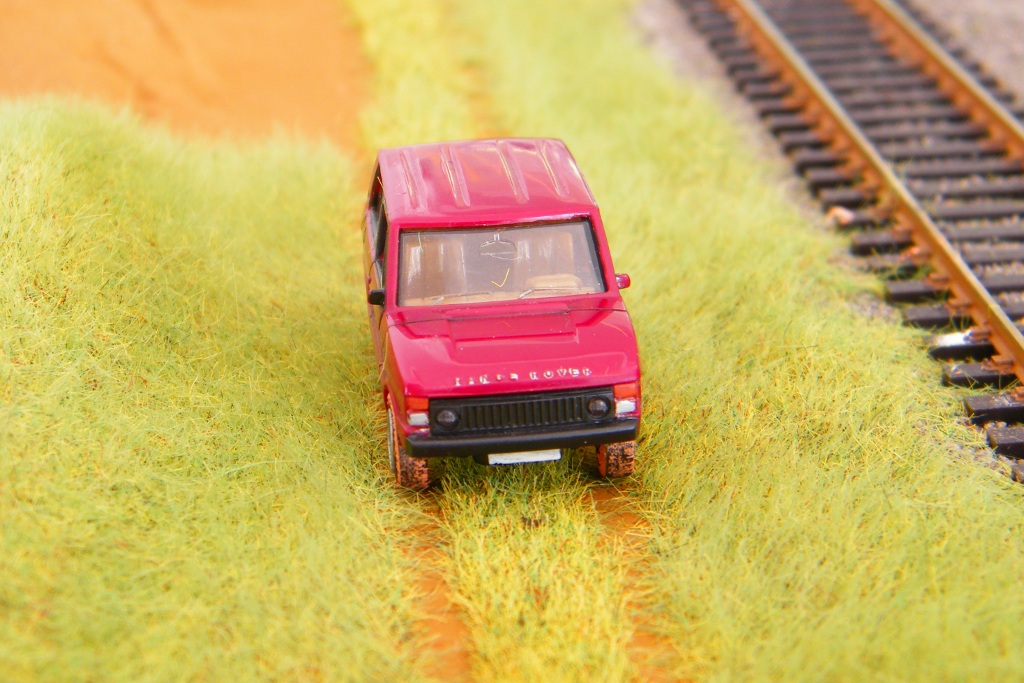
And as if experimenting with a high voltage tea strainer isn't enough, I've had a go at making a dirt track. Does it look OK? I'm honestly not sure about it.

And as if experimenting with a high voltage tea strainer isn't enough, I've had a go at making a dirt track. Does it look OK? I'm honestly not sure about it.
Detailing points
Originally posted 26/7/2010
A chance ebay find a while back provided me with a load of detailing parts for DR pointwork, sold as Tillig cat # 85509, although actually containing various Erbert parts- axle counters, point motors, check mechanism, markers, locking mechanism and mysterious electrical boxes. There were next to no instructions, so it took me a while to suss the placement, and even then it was only from an illustration on a Tillig dealer's site. So, armed with a little data and no knowledge, I have attempted to put these details in the right locations around Peco points.

All OK here as far as I can tell. The problem is, I don't know how I'm going to fit the details in on the next point up, nor what to do on the double slip. Guesswork seems my best option at this stage. Still, hopefully, even if I don't get it right, it'll add to the general sense of place.
Ein weiterer Stein in der Mauer
Originally posted 22/7/2010
Yes, a pop culture title so obvious I had to translate it to reduce the cringe induction. Sorry.
Just a small bit of work on a part of Bad Horn which had been bothering me. Along most of the length trees are my method of choice to blend backscene and model. However, the bay platform track is right up against the backscene so there simply wasn't room. I bought some Auhagen low relief card buildings to try and nail it, but when I came to putting them in place, they just looked wrong. So I hummed and hawed for a couple of months and got nowhere fast. I don't know why it took me so long to just try a wall in place, but this week I finally did- and I like it. I think I just tried to make matters too complicated when something simple is more effective.

I also made a static grass applicator today (tea strainer and flyswat variety), so its time to crack on with scenics. Having made a few using Hornby materials, I also caved in to impatience and ordered a bunch of ready made trees. The stretch without trees behind the bay served to separate my efforts from the bought ones, so I can clump all mine on the bank by the bridge and scenic break. This area will be the main grass patch.

I also made a couple of decisions (and corresponding orders) today, that I will use Hp light signals (on economy grounds, and with my original signalling plan, allowing passenger use of the bay), and Piko Silberlinge. I specifically want a Karlsruhe cabbed driving trailer, and I can't find any 1:87 Roco ones for sale. Plus Piko is half the price! All signals and the Steuerwagen were ordered today from Lokshop, I'll order a couple of trailers at a later date if I'm happy with it. I still haven't decided upon a control method for the signalling yet, but I'm tempted to go with DCC accessory decoders so that I can operate everything from a handset. The nice thing with a small layout is that I can experiment without massive cost.
Logic madness
Originally posted 21/7/2010
Two nights ago, I was sat scribbling in my notebook when my wife came to see what I was doing. She took one look at the product of my pencil, gave a disappointed sigh and declared "I don't want to know. I'm going to bed." and left me to my muttering accompanied sketches...
I mentioned back when I was trying out a Viessmann signal that I was considering designing a solid state interlocking panel for point/signal control. The idea just won't go away. I can't quite settle for individually controlled points and signals, I just wouldn't feel I'd done a good job unless they corresponded to one another. PC control is a possibility, but it doesn't seem right to control semaphores with the click of a mouse. I also had a go with Modratec's SigScribe, but had difficulties when it came to the group exit signal. A great shame, as I would love a physical interlocking frame. Doubtless a bit of trickery could fool SigsScribe into fitting my requirements, but solid state components are a lot cheaper. Don't be mistaken, I don't think Modratec frames expensive, it's just that I'd rather spend such money on a longer term layout.
So back to the muttering and scribbling. I won't pretend that I honestly know what I'm doing. My limited electronics tuition from my schooldays seems a long time ago, so I'm working from first principles. This may sound funny, but at this point I'm not after help with it- I'm going to try it in Crocodile Clips before actually building anything. I've also only drawn one side of the circuit, and only the control parts, not the actual power to the points and signals (which will be with relays or transistors). Ignore all the numbers scrawled on, they're just the results of me thinking with graphite.

As I look at the diagram again, I find myself questioning aspects, and wondering how far the interlocking should go. For instance, is it enough to have in one instance a conflicting route simply setting anything crossing its path to stop aspects, or should I make it that the route cannot be set other set routes conflict? The prototypical answer is the latter, but is that just making extra work for myself? I also look at the digram and wonder why I have done certain things. I think that a whole fresh draft now I've got the general ideas in my head may be worthwhile.
Testing times
Originally posted 16/7/2010
With Steinruecken disassembled from the move, I took the opportunity to tidy up the wiring and add plugs between the boards. My first step was to set up two buses the length of the layout on the low level boards, being DCC power and 16V AC. I used 15A wire for this task, as there's nothing like overkill where power buses are concerned! Theses run from four pads of verroboard at the board ends (attached with epoxy- I tried hot melt glue at first, but guess what that does when you put a hot soldering iron to it...). From these pads go the cross-board jumpers, which for use a four pin PC style power plug (the style go to disc drives), and the feeds to individual tracks. There's rather more of these feeds than are actually normally necessary, as I intend to add in full track circuiting for use with MERG RPC. From the low level to top level there are at present 15 pin sub-mini D connectors, although I fear this may not be enough on all boards once I get into the signalling. For now though, it means I can easily remove the upper level for continued work.
This all done, I reassembled the layout, and caused the first damage of the house move- I dropped a corner board, and knocked off the copperclad sleepers at one end of the main lines on the upper level. However, even with this happening, the copperclad proved its worth, and after resecuring it I was able to run trains. Ordinary track would surely have needed replacing.
Then came the serious business of
playing trains
testing. First off, just confirming that the wiring was all correct. Initial signs were promising, no instant shorts on start up. Then, I simply ran a loco round each track in turn, quickly finding that I'd missed a couple of feeds. Not a big drama. The next fault found was that as a train entered one board of the low level on one track, it shorted. The problem was as easy to find as it was to fix, I'd simply got the droppers the wrong way round. These few faults located and addressed, I am now looking at the actual running characteristics of the layout. Being on a new floor has resulted in some boards not being quite level, for now addressed with slipping plywood pieces under the legs, but utimately I will try to find some screw adjusters. There's still a sag in one track needing addressing though.
One one of the helices I had been having trouble with trains of longer than six coaches. The sheer weight of train pushing against itself seemed to be causing derailments. However, this had been with Sachsenmodelle coaches, and now I'm running full rakes of Roco I actually put the issue down to SaMo's poor assembly and light wieght. I'm still suffering rogue uncoupling with Roco close couplings though, as these have no vertical lock. I could change to Roco universals (which have a very positive lock in all directions), but I have traced the problem to the change from Atlas to Piko track on one helix- the change point has a slight change in radius, and this seems to be the source of the issue. I'm tempted to build a whole new helix, as I have a mass of Piko A track of 422mm radius, and the timber required costs less than new track- the present helices use Atlas 15" radius.

So that's about where I'm up to now. I've still got one road to lay, and a whole lot of things I could do with buying- I'm out of point motors for a start. But I think my next bit of shopping will be a quantity of timber.
Sending the right signals
Originally posted 14/7/2010
We finally have a new home (well, have done for a month now!), and after erecting Steinruecken my thoughts returned to Bad Horn, and how it should be current priority with an exhibition booking in November.
In lieu of any procrastination, I finally feel I have nailed the signalling. Wolfgang Meyenberg's website is essential reading for anyone trying to get to grips with German signalling, and along with a couple of cribs in the form of prototype plans today something just clicked in my mind, and it all made sense. Well, mostly. In Herr Meyenberg's own words,
Perhaps I just lost my marbles, and it only seems to make sense! In any case, the biggest mental obstacle to overcome was my understanding of British railway signalling. Although superficially similar, there are sufficient differences that mentally referring to British practise caused me more problems than it solved. I was actually quite comfortable with the meanings of the various signals, it is the practises which differ- and in trying to realistically portray German railways, that is what counts. And so, with good old fashioned pencil and paper, I have attempted to translate my apparant lucidity into something concrete.

And not quite so old fashioned and considerably sillier, I used the GIMP to mock up signal placement. Ignore the displayed aspects, they don't relate at all to one another!

A slight hinderance to the right feel is the heashunt. It's a most un-Germanic thing to have at a branch terminus. I suppose it adds flexibility though, and enables two trains to be moving at once. Shame I only have one brain which isn't too hot at such multi-tasking.
Finally, I got round to pricing up the appropriate Viessmann signals. Ouch. I could buy a loco for each road signalled using their semaphores. But I can't bring myself to have an unsignalled layout, and luckily, it is possible to directly substitute the Hp semaphores with Hp light signals, which reduces the cost by a huge amount. A departure signal with shunting signal costs less than just the semaphore shunt signal, let alonge the Hp0/2 signals... they're not as pretty though. But I'd rather have dull signals than no signals.
We finally have a new home (well, have done for a month now!), and after erecting Steinruecken my thoughts returned to Bad Horn, and how it should be current priority with an exhibition booking in November.
In lieu of any procrastination, I finally feel I have nailed the signalling. Wolfgang Meyenberg's website is essential reading for anyone trying to get to grips with German signalling, and along with a couple of cribs in the form of prototype plans today something just clicked in my mind, and it all made sense. Well, mostly. In Herr Meyenberg's own words,
Quote
"Only true experts (which certainly I am not) may dare to take a look at German Rail's rulebook which I think were made by The Conspiracy to drive brave people insane"
Perhaps I just lost my marbles, and it only seems to make sense! In any case, the biggest mental obstacle to overcome was my understanding of British railway signalling. Although superficially similar, there are sufficient differences that mentally referring to British practise caused me more problems than it solved. I was actually quite comfortable with the meanings of the various signals, it is the practises which differ- and in trying to realistically portray German railways, that is what counts. And so, with good old fashioned pencil and paper, I have attempted to translate my apparant lucidity into something concrete.

And not quite so old fashioned and considerably sillier, I used the GIMP to mock up signal placement. Ignore the displayed aspects, they don't relate at all to one another!

A slight hinderance to the right feel is the heashunt. It's a most un-Germanic thing to have at a branch terminus. I suppose it adds flexibility though, and enables two trains to be moving at once. Shame I only have one brain which isn't too hot at such multi-tasking.
Finally, I got round to pricing up the appropriate Viessmann signals. Ouch. I could buy a loco for each road signalled using their semaphores. But I can't bring myself to have an unsignalled layout, and luckily, it is possible to directly substitute the Hp semaphores with Hp light signals, which reduces the cost by a huge amount. A departure signal with shunting signal costs less than just the semaphore shunt signal, let alonge the Hp0/2 signals... they're not as pretty though. But I'd rather have dull signals than no signals.
Taking Stock
Originally posted 4/6/2010
With Bad Horn currently ensconsed in the Marklin Model Railway Club's clubrooms, and me still living in temporary accomodation, work is slow. Plus, what little work I have done I can't show as I keep forgetting to take my camera. Still, one thing I can do is a little stock work. Even that is a little limited though, as I have nowhere for spraying or getting really messy. However, in the interests of my sanity I had to do something, and so using Tamiya Weathering Masters I started work on Bad Horn's signature loco, an ocean blue 212. Rather than the applicator supplied with the Tamiya "compacts" I used a smaller paint brush, and tried to follow some of the patterns evident in pictures on Bahnbilder.

I'd actually been whinging a bit to my friends about not being able to use my airbrush at present, but on reflection, this is good. I would not have good such results with one. For all airbrush weathering can look good and replicate similar patterns, it always looks, well, airbrushed...
Anyway, the loco is far from finished, I've only done one side of the bonnets and underframe and not even touched the cab or tops. But still, I feel I'm on the right track.
Agent of chaos
Originally posted 26/2/2010
Thanks to a spiteful letting agent and practises which would probably be illegal in Britain (and if I'd not been in a fixed term contract, would be illegal here), I will become temporarily homeless this weekend. For how long I don't know, I'm determined to find a better quality house this time (which actually has insulation and draught proofing) and I'm comitted to a month in a temporary solution, a serviced apartment. That may sound a bit dramatic, but it's legally true. As such, I've had to dismantle Steinruecken and it goes into store this weekend. At least I'd got to running some trains before taking it down.
Bad Horn is now up at the Marklin Model Railway Club rooms, which will enable me to carry on working on it. I've been invited to exhibit it at RailEx (Wellington, not Aylesbury!), so I've got to get it really presentable. It's not bad at this point compared to other layouts on the local scene, but I want to make an impression. At this point I'm making lots of trees, and I need to make some ultra low relief buildings too. At least this is work which can be done at a dining table.
Packing away all my stuff reminded me how unfocussed I can be. Aside from a concise set of 70s/80s DB branch line stock, there aren't any sets that allow complete operation of a layout. The trouble is, everything has an ultimate goal and/or reason for its initial purpose, so getting motivated to rationalise is very hard. At this point, I have...
- 00 1960s BR(M) stock - a legacy of being a member of the Mid Cheshire MRS who had an excellent ex L&Y/Cheshire Lines layout.
- H0 DBAG 2001 fleet - ever growing, for Steinruecken
- H0 DB 1970s/80s. Essentially a complete set, some wagons overlap with the 2001 fleet. Only planned addition will be some scale length Silberlinge, and I haven't decided which brand (Piko, Roco or Lima/Rivarossi) to buy yet.
- Circa 1990 BR stock for a Weymouth scenario. Slowly progressing EMUs, a few locos, coaches and civils wagons.
- A small amount of German N, generally aiming towards contemporary scene. I wish I could bring myself to flog it, but the urge to do some scenic modelling somehow persuades me to hang onto it.
- Scattergun H0e with an unintentional Austrian bias. Half the locos don't work, and the coaches catch the point motors on the layout. Disheartening, and low resale value owing to mods and condition. Originally Steinruecken was intended to have some Ruegensche Kleinbahn tracks on it, but then I saw the price of the appropriate Bemo locomotives!
- Shrinking TT collection, mostly Berliner. I've sold a lot of it, but I'm keeping others for a "one day" Furth im Wald layout, and indeed recently obtained a Piko Alex ER20- soon to be historical with the DB buyout of Arriva?
- A few bits of 0 gauge, with a Forest of Dean diesels focus. In store in England.
- A G scale GP7 with value decreased by a repaint. In store in England.
Seeing the light
Originally posted 10/4/2010
Now that Steinrücken is a running layout, the opportunity to play trains is not to be missed. Pending a circuit diagram for an occupancy detector I've been promised, proper wiring is slighly held up, but then it'll be easier to wire when the layout is dismantled. As I'm moving house later this month that would be the sensible time to seperate all the boards and wire in the comfort of a chair with the baseboards on end.
Having some inexplicable urge to do things with a soldering iron, I decided to DCC fit some older models which were not DCC ready- two Bimdzf269s and a 628/928 DMU. At this point I've retained the factory lighting, but light bleed is such that I'm going to have to do a better job with some home made LED boards eventually.


The upper headlight of the triangle should not have light showing at the same time as tail lights! Not that the DCC ready models are any better...

This loco caused me some consternation with another problem...
I had run the loco round light before putting a train on the layout to ensure everything was working and that there were no obstructions. All was fine. Adding a short (five coach) push-pull InterRegio rake, as it entered one helix there was a short and the DCC system stopped everything. I spent ages looking at the track on the helice, trying to work out what the problem was, and indeed went to bed without having solved it. However, this morning, a bit fresher, the somewhat obvious thought of checking the train occurred to me. The Roco 112s/143s have pickups bearing onto the tops of the wheel flanges, rather than the back of the wheels...
On one bogie they were bent upwards, so as the loco negotiated the particularly rough joint between the final baseboard and the "Binz" helix (the only joint without alignment dowels), the pickups contacted the cast metal chassis. I hadn't had this when testing light engine simply as I had the loco facing the other direction.
As far as push pull rakes go, because my intention is to run fixed formation, the driving trailer shares the address with the locomotive rather than needing to be set up as a consist. I'm not even sure if the cheap Hornby decoders I use as function only decoders support consisting.
Now that Steinrücken is a running layout, the opportunity to play trains is not to be missed. Pending a circuit diagram for an occupancy detector I've been promised, proper wiring is slighly held up, but then it'll be easier to wire when the layout is dismantled. As I'm moving house later this month that would be the sensible time to seperate all the boards and wire in the comfort of a chair with the baseboards on end.
Having some inexplicable urge to do things with a soldering iron, I decided to DCC fit some older models which were not DCC ready- two Bimdzf269s and a 628/928 DMU. At this point I've retained the factory lighting, but light bleed is such that I'm going to have to do a better job with some home made LED boards eventually.


The upper headlight of the triangle should not have light showing at the same time as tail lights! Not that the DCC ready models are any better...

This loco caused me some consternation with another problem...
I had run the loco round light before putting a train on the layout to ensure everything was working and that there were no obstructions. All was fine. Adding a short (five coach) push-pull InterRegio rake, as it entered one helix there was a short and the DCC system stopped everything. I spent ages looking at the track on the helice, trying to work out what the problem was, and indeed went to bed without having solved it. However, this morning, a bit fresher, the somewhat obvious thought of checking the train occurred to me. The Roco 112s/143s have pickups bearing onto the tops of the wheel flanges, rather than the back of the wheels...

On one bogie they were bent upwards, so as the loco negotiated the particularly rough joint between the final baseboard and the "Binz" helix (the only joint without alignment dowels), the pickups contacted the cast metal chassis. I hadn't had this when testing light engine simply as I had the loco facing the other direction.
As far as push pull rakes go, because my intention is to run fixed formation, the driving trailer shares the address with the locomotive rather than needing to be set up as a consist. I'm not even sure if the cheap Hornby decoders I use as function only decoders support consisting.
The trains of Steinruecken
Originally posted 5/3/2010
I had initially intended Steiüuecken to be set in 1999, but having kept coming across information relating to 2001, I decided that this would be the year for me. The downside is that there would be a slightly lower amount of pre-DBAG liveries, but nonetheless there was still a lot more variety than the present day.
From the Fernverkehrsseit came long distance train carriage formations and timetables, as well as loco diagrams which I spent some time today decoding. The February 2001 issue of Today's Railways and subsequent letters pages also filled in some gaps, particularly the patterns of local traffic.

Guess what? This train, the first I started building up, is superfluous. Although very much a part of the Rügen scene today, the use of DB Autozug locomotives from Stralsund and rakes of Czech stock from Vienna and Brno weren't there in 2001. Likewise the Leipzig/Berlin-Malmö InterRegios weren't around (having ceased in 2000), but a pair of night trains, D318/9, still ran. So that's eight coaches (only the IR Bimdz is useful for other trains) and one loco which I needn't have bought. Oh well- it all frees up storage yard space!
Although I haven't got the actual timings, I know that local traffic sees hourly trains in each direction. These are an easy modelling prospect, being formed of a BR143 and two or three modernised ex-DR double deck coaches. I have two sets for this, one all traffic red, the other has a mint green/cream driving trailer and a DR liveried 143. To ring the changes I also have a BR219 and Halberstadts, as used while work was being carried out on the OHLE in 2001.
Having sifted through the information available, I have made a list of the long distance trains travelling through Rügen, their formations and allocated traction. For the record they are listed below, in order of arrival/departure time from Binz/Sassnitz.
D319 21:35 Malmoe - Berlin Zoo (Sassnitz Hafen dep 02:30) Bim Bim Bimd Bcvmz WLABm BR112
D318 23:36 Berlin Zoo - Malmoe (Sassnitz Hafen arr 03:20) Bim Bim Bimd Bcvmz WLABm BR112 [there is a question mark over this pair, I have seen illustrations with a train of two Swedish coaches]
IR2674 "Arkona" 05:28 Hamburg Hbf - Binz (arr 09:31) Apm W137 Bvm Bpmb Bpm Bpm Bpm Bpm Bpmbdf BR101 (Intercity stock)
NZ1950 19:44 Stuttgart Hbf - Binz (arr 09:56) Bimd Bim Bim Bom Bpmbk Bvcmz Bvcmz WLABsm Bom Bvcmz Bvcmz DWLAB BR112
IC 609 "Ruegen" 10:22 Binz - Basel SBB Apm W137 Bvm Bpmb Bpm Bpm Bpm Bpm Bpmbdf BR101
IR 2672 "Seewind" 07:28 Hamburg Hbf - Binz (arr 11:31) Aim ARkimb Bim Bim Bim Bim Bim Bimd Bpmbdf BR120
IR2577 "Arkona" 12:22 Binz - Karlsruhe Hbf Aim ARkimb Bim Bim Bim Bim Bim Bimd Bpmbdf BR120
IR2670 "Zingst" 05:59 Kassel Hbf - Binz(arr 13:31) Aim ARkimb Bim Bim Bim Bim Bim Bimd Bpmbdf BR120
IR2579 "Darss" 14:22 Binz - Frankfurt (M) Hbf Aim ARkimb Bim Bim Bim Bim Bim Bimd Bpmbdf BR120
IR2578 "Darss" 06:12 Frankfurt (M) Hbf - Binz (arr 1531) Aim ARkimb Bim Bim Bim Bim Bim Bimd Bpmbdf BR120
IR2671 "Zingst" 16:22 Binz - Hannover Hbf Aim ARkimb Bim Bim Bim Bim Bim Bimd Bpmbdf BR120
IC702 "Rugen" 06:17 Karlsruhe Hbf - Binz (arr 17:31) Apm W137 Bvm Bpmb Bpm Bpm Bpm Bpm Bpmbdf BR101
IR2673 "Seewind" 18:22 Binz - Hamburg Hbf Apm W137 Bvm Bpmb Bpm Bpm Bpm Bpm Bpmbdf BR101 (Intercity stock)
NZ 1951 18:55 Binz - Stuttgart Hbf Bimd Bim Bim Bom Bpmbk Bvcmz BvcmzWLABsm Bom Bvcmz Bvcmz DWLAB BR112
In addition is a mysterious pair which only show up in loco diagrams.
93029 01:00 Stralsund - Sassnitz Hafen (arr 0200) BR112
93028 03:30 Sassnitz Hafen - Stralsund BR112
Given the timings, I assume it is a night train which uses the train ferry, but nothing has jumped out from train lists to fill this gap.
As can be seen from the coach plans, the majority of these trains are formed of a BR120 and a standard push-pull IR rake. Although I've managed to make up about half the rake from the second hand market, matters are made easier by Roco releasing a batch of IR stock this year. A BR120 will have to come from the Trix or Lima range. I can't put my finger on why, but although the Trix 120.1 is a very recent model, there's something about the Lima one which looks more right to me, but they are also harder to find.
In keeping with the era, the Intercity rake will have mixed liveries, although I've only bought one vehicle (the Bpmbdf driving trailer) towards it so far.
There's also a lack of Autozugs as far as I can work out, which is odd as I'm sure I've seen pictures of them on the island in 2001. I also don't have timings or formations for the Urlaubsexpress services, so I still have work to do!
Subscribe to:
Posts (Atom)