
I write this tired and happy after a successful exhibition debut at RailEx over the weekend. I'm really very pleased, and totally exhausted.
First, before I witter away, massive thanks to Kev Prince (Mr45144) who flew up from Christchurch for the weekend, got the hang of operating the layout in barely five minutes and helped keep me sane all weekend. Seriously, it would not have been nearly so fun or easy without him. Also to my wife, although she doesn't read the forum! She's put up with my stressed state and been totally helpful with useful, intelligent criticisms
I'd be lying if I said Bad Horn has operated perfectly. Temperature and atmospheric differences meant some parts didn't run as smoothly as at home, and general bumps from the public and such less-smooth running meant the delayed action of my preferred couplings was lost at times as wagons bounced apart and then back together. I need a standard H0 back to back gauge, as 00 fine standard isn't quite right, but there weren't many derailments. I got the 364 working, but it was unreliable. Luckily Kev brought up a 212, which relieved the traction shortage very nicely. I still resorted to running an out of period 220 though, but whether that was really a last resort or succumbing to temptation I don't know. Problems or not, I think Bad Horn was well received by the public. I was slightly surprised by how much some children liked it, as its really a shunting plank and there were lots of layouts with sound, lights etc, so it goes to show that received wisdom isn't always right. The biggest flattery came from the fact that a good few Germans were very complimentary about the layout (Surprising how many there were, but Wellington is full of expats), and now I'm comfortable that I can create a good sense of a time and place really quite alien to me- books and pictures are my sources.
There are a few ifs and buts regarding lessons, but the important consideration is that the layout was initially built with bits I had lying around. Any comments about what I should have used for certain aspects (mainly the track) are really null, because they aren't the things I would go out and buy!
But what now? There's a few details that I could add, and improvements I could make, but as always I just feel like moving on. Not through frustration, but through a desire to keep advancing my modelling. In the short term (ie the remainder of this year) I could finish ###### (H0e) which is gathering dust and dents in the garage at present. It needs a couple of new points and scenic work finishing. I'm tempted to use it as a test best for scratch building overhead electrification as I have a Mariazellerbahn train and it's all on one board. On the other hand, I could get it to a point at which it looks attractive, then sell it to clear the space. I'm not very satisfied with the running qualities of H0e. Beyond that, I have a desire to turn my modelling time and resources towards longer term, high standard targets. I've fallen out of love with Steinrücken, as flat top baseboards and 180ocurved stations just aren't satisfying. If anything I could take the base level (ie concealed storage roads) and start a fresh scenic level, but at this point I think I'd like to move away from fictional stations and do something more fulfilling. There are two main avenues of thought in my mind at present, that of a mainline layout with a yard (I'm really not that fussed about having a station) or a full branch line with the distances between yards/industries pretty well ignored- I'd be most content running pick up freights. The latter would allow a number of self-contained layouts to be built as part of a larger whole, giving something to play with quickly which then blossoms into something approaching a system.
There are a number of other questions of era and scale, although at present H0 remains front runner for decent shunting and breadth of range (plus the fact I have a decent amount already). TT is as small as I'd go, and the 28 Oots plus a dozen type Ys I already own have potential...
Anyway. Please excuse my sleep deprived ramblings. Thanks again to Kev, it's a been a bloody good weekend mate!
Sunday, November 21, 2010
Wednesday, September 1, 2010
Silberling Supertest
Aside from locomotives, probably the key signature vehicle for a West German layout set from the 1960s through to the 1990s is the humble Silberling (literally Silver Piece, but also commonly referred to as Silverfish by UK enthusiasts). Over 7,000 were built, so their presence was almost universal on the DB. Even today, modernised examples still work daily in many areas. The short rakes make them ideal for smaller layouts as well, two to four being pretty normal. Just about any loco can go with them too, , with a flick through Die DB der achtziger Jahre illustrating haulage behind class 141, 220, 112, 211, 104, 212, 111, 215, 140, 110, 181, 216, 218, 202 (Henschel Prototype), 144, 118, and 169 and even 193. It seems the only types not illustrated hauling them were 103s and 120s! For Bad Horn though, a 212 will be the main hauler. I'd recommend die Bundesbahnzeit if you're seeking inspiration for use of Silberlingen.

With such omnipresence, one might expect that a scale length H0 version be a permanent fixture in the catalogue of at least one manufacturer. This was not so, although versions have been made by Roco, Lima and Ade. All of these are fairly expensive, priced up to £70. In addition, availability is poor, with Roco only periodically releasing variants, and the Lima models yet to resurface under Hornby's ownership (although announced as a four pack in silver and traffic red liveries in this year's Rivarossi range).
Lately, Piko's Hobby range has been steadily expanding, and the Silberling is the most recent newly tooled coach family to join the range. The "Rabbit hutch" cab design was first on the market, and not unexepectedly the "Karlsruhe"
 type followed in this year's announcements. As is usual for Piko Hobby models, the prices are well below the equivalent items in standard ranges, in fact only just over slightly half the price compared to Roco. As you'd expect, shortcuts have been taken. But does half the price mean half as good?
While the Roco model is undoubtedly more refined, the simple act of putting the two brand's models into the same rake does not immediately jar to my eyes. Standing back at "normal viewing distances" the noticable differences are the heavy (about the scale thickness of an arm!) weld lines on the Piko model's roof and a difference in ride heights. The rooves are different colours, but from photograph's I'd say either is realistic. Although having the two colours in one rake might look silly, it's perfectly prototypical! Getting back to the roof ribs, even on Roco they're too heavy, so it might put some buyers off. Sometimes the weld lines on the real thing are next to invisible.
Getting up close, some of the savings become quicky apparant. While Roco have applied separate handrails, on the Piko model they are moulded on, and the Roco model features rivet detail around the windows. That said, the rivets are not particularly noticable on the prototype. Also, Piko have moulded on the electric train heat cable, which is a customer-fitted detail on the Roco coach.

The quality of the bodyside glazing is surprisingly high on the Piko model, showing only slight prismatic effects. However, on the cab, the retaining clips of the corner windows are plainly visible. In fact, the cab glazing as a whole is not that great.

You may have also noticed on the last couple of pictures that there are some fuzzy edges to the blue paint on the Piko model. I'm actually surprised by this, as generally I find Piko's finish superior to Roco's. That said, as the solebar on the Roco model is separate to the main body, they can't fail to have a crisp separation of colour. There's definite bleed on the first class yellow stripe, but it's not too noticable.

Still on the finish, I think I prefer Piko's representation of the "peacock tail" pattern on the lower bodyside, but there's not a great deal in it. Lettering and logos is very crisp on both, and as far as I can work out, the technical details on both is correct, along with representative servicing dates.
Perhaps one reason Piko felt able to include Silberlingen in their Hobby range is the generally simple nature of the details they have. There's not that much need for additional details, and turning to the underside we can see some of the few that Roco have seen fit to include compared to Piko's moulded on representations, specifically the brake rigging.
Keeping my eyes down under, there appears to be only slight discrepancy between the various undergubbins represented by the competeing marques.
The Roco model shows more refinement in the parts, but you'd hope so at the price! Piko's glazing shows a surprising upper hand, in having the handles for opening the windows moulded- Roco has no representation of them at all. However, Roco's refinements shine through again on their pickup method compared to Piko's, namely bearings collecting from all wheels, while Piko have adopted a strip picking up from the axles, meaning only two wheels per bogie collect current. Piko do put the power to good use, with nice warm-white lighting for the forwards direction. Surprisingly, no provision for DCC appears to have been made, although I await a reply to an email I have sent Piko requesting assistance in this respect. Back to the bogies, Roco have used multiple mouldings while Piko uses a simpler one piece model, although the dynamo is a separate part. No representation of the sanding gear or Indusi which should be present on the Steuerwagen is made though.

Around the doorways, Roco again show their mettle- the footsteps are individual mouldings, giving an excellent appearance. Piko's modelling of this area is less flash, and it would benefit from a bit of the buyer's attention, probably nothing more sophisticated than a bit of styrene strip.

To be continued

With such omnipresence, one might expect that a scale length H0 version be a permanent fixture in the catalogue of at least one manufacturer. This was not so, although versions have been made by Roco, Lima and Ade. All of these are fairly expensive, priced up to £70. In addition, availability is poor, with Roco only periodically releasing variants, and the Lima models yet to resurface under Hornby's ownership (although announced as a four pack in silver and traffic red liveries in this year's Rivarossi range).
Lately, Piko's Hobby range has been steadily expanding, and the Silberling is the most recent newly tooled coach family to join the range. The "Rabbit hutch"
While the Roco model is undoubtedly more refined, the simple act of putting the two brand's models into the same rake does not immediately jar to my eyes. Standing back at "normal viewing distances" the noticable differences are the heavy (about the scale thickness of an arm!) weld lines on the Piko model's roof and a difference in ride heights. The rooves are different colours, but from photograph's I'd say either is realistic. Although having the two colours in one rake might look silly, it's perfectly prototypical! Getting back to the roof ribs, even on Roco they're too heavy, so it might put some buyers off. Sometimes the weld lines on the real thing are next to invisible.
Getting up close, some of the savings become quicky apparant. While Roco have applied separate handrails, on the Piko model they are moulded on, and the Roco model features rivet detail around the windows. That said, the rivets are not particularly noticable on the prototype. Also, Piko have moulded on the electric train heat cable, which is a customer-fitted detail on the Roco coach.

The quality of the bodyside glazing is surprisingly high on the Piko model, showing only slight prismatic effects. However, on the cab, the retaining clips of the corner windows are plainly visible. In fact, the cab glazing as a whole is not that great.

You may have also noticed on the last couple of pictures that there are some fuzzy edges to the blue paint on the Piko model. I'm actually surprised by this, as generally I find Piko's finish superior to Roco's. That said, as the solebar on the Roco model is separate to the main body, they can't fail to have a crisp separation of colour. There's definite bleed on the first class yellow stripe, but it's not too noticable.

Still on the finish, I think I prefer Piko's representation of the "peacock tail" pattern on the lower bodyside, but there's not a great deal in it. Lettering and logos is very crisp on both, and as far as I can work out, the technical details on both is correct, along with representative servicing dates.
Perhaps one reason Piko felt able to include Silberlingen in their Hobby range is the generally simple nature of the details they have. There's not that much need for additional details, and turning to the underside we can see some of the few that Roco have seen fit to include compared to Piko's moulded on representations, specifically the brake rigging.
 |
| Roco |
 |
| Piko |
 |
| Roco |
 |
| Piko |

Around the doorways, Roco again show their mettle- the footsteps are individual mouldings, giving an excellent appearance. Piko's modelling of this area is less flash, and it would benefit from a bit of the buyer's attention, probably nothing more sophisticated than a bit of styrene strip.

To be continued
Sunday, August 22, 2010
The light at the end of the tunnel
Is just someone with a torch bringing me more work.
A couple of friends have asked me for pictures of where I'm up to with Bad Horn, and I've not got round to taking any recently. I've ground to a halt for want of inspiration and materials (although signals and bufferstops are on their way), and to try and motivate myself I had a look at all I've done so far. And felt utterly disheartened.

I still haven't got the backscene effectively blended into the scenery, although it has improved. I also made a jobs list of outstanding work. So far I've come up with:
And every time I think for a minute, another task comes to mind, and that's without trying to add character and cameos.
I'm actually utterly frustrated with my own abilities, I find the layout looks garish and train set like. It's too shallow (only 300mm deep) which leads to most of the visual problems. Still, I'm determined to complete this one, so just gotta keep plugging away.
A couple of friends have asked me for pictures of where I'm up to with Bad Horn, and I've not got round to taking any recently. I've ground to a halt for want of inspiration and materials (although signals and bufferstops are on their way), and to try and motivate myself I had a look at all I've done so far. And felt utterly disheartened.

I still haven't got the backscene effectively blended into the scenery, although it has improved. I also made a jobs list of outstanding work. So far I've come up with:
- Fit bufferstops
- Fit point motors
- Fit signals
- Weeds
- Repaint hardstanding (I just can't get it the right colour)
- Put fence or crash barrier around hardstanding
- Repaint the signal box
- Bushes for backscene blending
- More trees (left hand end)
- Put a track on the overbridge
And every time I think for a minute, another task comes to mind, and that's without trying to add character and cameos.
I'm actually utterly frustrated with my own abilities, I find the layout looks garish and train set like. It's too shallow (only 300mm deep) which leads to most of the visual problems. Still, I'm determined to complete this one, so just gotta keep plugging away.
Friday, August 20, 2010
Red Double Deckers
Originally posted 15/8/2010
Amongst the releases promoted by Piko this year, some older models cascaded from Classic to Hobby range caught my eye. These were the refurbished ex-DR double deck coaches in traffic red. This shuffling was accompanied of a RRP reduction from Eur93.49 to 39.99 in the case of driving car, and from 69.99 to 29.99 for the all 2nd. Previously these coaches has only been available in the Hobby range as (innacurate) Metronom examples. With such a saving, some economies were surely inevitable. Nevertheless, I placed an order for a couple and waited...
Last week, they finally found their way to my post box. Although they weren't the most common type on Rügen (this falls to the unavailable-as-a-model DABbuzfa 760) they were certainly present around 2000, so they're the best thing available to me for my Regional Expresses. Like an excited child at Christmas, I eagerly pulled them out of their packaging for a good look. Naturally, the driving car (DABbuzfa778.0) draws my attention most.

Shortcuts or otherwise, it certainly looks the part. Without going into any great detail, the only thing that gives me any cause for concern in the basic model is that perhaps the cab isn't raked back far enough. Have a look at the prototype to see whether you agree.
Really my concern with these models isn't any fundamental accuracy issues, it's what detailing they might need to be brought up to a similar standard to my Roco coaches. With the financial saving compared to the classic models, I'm prepared to put a bit of effort in. So rather than being a review, this post mainly concerns my search for the modelling I will want to do.
The biggest job is the window frames. They're aluminium or something on the prototype, and in the catalogue images they appeared painted. However, those catalogue images were probably actually the classic models. The unpainted clear plastic on the model just doesn't look right. I have tried painting window frames previously, but it's tedious and needs a good steady hand, which I don't always have. I think my best option might be to try drawing up an etch to make overlays from stainless steel. They'll be a nice straightforward thing to learn etch design with too.
Another obvious area is the bogies. Compared to the classic model, Piko have reduced the number of parts drastically. It's essentially just the basic frame now, no brake rigging or other details. Here's the leading bogie, drivers side of a Piko "Classic" DBmq 776.

As you can see, it has brake blocks nicely in line with the wheels and an indusi (German AWS equivalent, a bit more like ATP) receiver. Now, the equivalent view on the "Hobby" DABbuzfa778.0.

It shouldn't be too hard to make up the missing details. They are different on the DABbuzfa778.0 to the DBmq776 though, and there is the addition of sanding gear.
There's also quite a lot of printed detail.

I'm not sure what I'll do about this, I always find it hard to blend added details into the factory finish. I'll just see how much it bugs me over time for now!
Finally, the model lacks factory fitted lighting. However, it is available as an accessory part, but at 30 Euros I will probably just make my own. It's not a job I find tricky!
As a closing note, a front end comparison between the "Classic" DBmq 776 and Hobby DABbuzfa778.0.

On the fiddle and at the tea
Originally posted 11/8/2010
Following a suggestion from Phil Harding of using tea leaves for leaf litter, and the realisation that the current malty breakfast blend I'm currently drinking has an admirable mix of leafy bits, sticky bits and general dust I dried some post-brewing dregs out on a baking tray in a low (50oC) oven. The brewing and drying made it lighter colours too, which look better than the very dark pre-brewing shades. Three pots and a quick grind with a pestle and mortar to generate a bit more fine material, some dilute PVA, and the result is pictured...

I had other more expensive products suggested to me, but the tea looks the business and you get to have a nice brew in the process.
On a more significant turn, I have finally made a traverser fiddle yard for Bad Horn, having bought the runners months ago. No rocket science here, just checks with a set square and a lot of luck. Well, except for one thing... I had already built a pair of boards for a conventional points ladder type yard, and to drill the holes in the end piece of the new traverser I decided I'd take the end piece off the previous board and use it as a template. So, I merrily whipped out the screws to the longitudinal battens and gave it a tap with a hammer to break the glue bond. It barely twitched. So, I laid the board down on the deck, stood in the middle to stop it moving and gave a couple of good belts. Off came the end piece, along with part of the top, well held with three more screws... Oops.

Anyway, other than my own stupidity there were no problems in the build. I did notice that the MDF shelf I am using as the top piece (18mm- I didn't feel like making two frames, and didn't trust myself to make them both square) was sagging in the centre, so popped down to Mitre 10 to get one more runner for the central cross member. Of course, drawer runners are only sold in pairs, so I have one spare. Pictured here is the base frame before the central runner went in. Note that the runners are a little short. I'm using a 300mm wide shelf, but the runners come in 250 or 400mm lengths. Still, as it moves both ways, that's no problem.

There was one bit of really good luck. By turning a batten on its side, its depth plus the ply top at the end is within a millimetre of the depth of the shelf plus runners. That saved a lot of messing about!

You can also see the sag that concerned me in that image.
Next stage, maybe even tomorrow, I'll head to the Warehouse and get some cheap workmates to act as layout support. At $20 each with four needed for the layout, it's cheaper than I can make legs for. Also, Diane has authorised Bad Horn's semi-permanent erection in our spare room/study- even though it means moving her desk.
I've been at the grass, man
Originally posted 30/7/2010
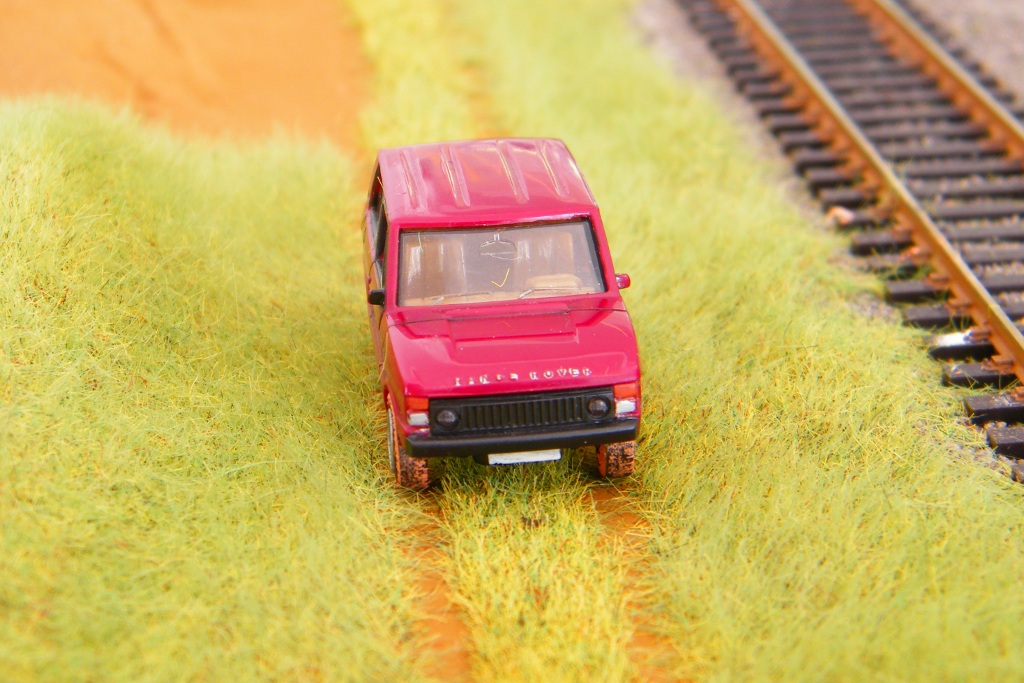
And as if experimenting with a high voltage tea strainer isn't enough, I've had a go at making a dirt track. Does it look OK? I'm honestly not sure about it.

And as if experimenting with a high voltage tea strainer isn't enough, I've had a go at making a dirt track. Does it look OK? I'm honestly not sure about it.
Detailing points
Originally posted 26/7/2010
A chance ebay find a while back provided me with a load of detailing parts for DR pointwork, sold as Tillig cat # 85509, although actually containing various Erbert parts- axle counters, point motors, check mechanism, markers, locking mechanism and mysterious electrical boxes. There were next to no instructions, so it took me a while to suss the placement, and even then it was only from an illustration on a Tillig dealer's site. So, armed with a little data and no knowledge, I have attempted to put these details in the right locations around Peco points.

All OK here as far as I can tell. The problem is, I don't know how I'm going to fit the details in on the next point up, nor what to do on the double slip. Guesswork seems my best option at this stage. Still, hopefully, even if I don't get it right, it'll add to the general sense of place.
Subscribe to:
Comments (Atom)